Friday, April 8, 2011

Waco Quilt Show--Part Two

My Redwork Romance quilt was entered in a division that was described as "Kit, Block of the Month, etc., all sizes and techniques (pattern or blocks purchased with preselected fabric or top is pre-stamped."  My quilt was originally bought as a kit, with the embroidery design pre-stamped, and it included all the fabrics for the blocks; only the backing had to be bought separately.  Over the years since I purchased it, I have worked sporadically on the embroidery.  Finally this Spring at my Bee gatherings, I finished the embroidery.  Then, I assembled the quilt blocks, sewed them together with the embroidered squares, and friend and super quilter Judy Steward quilted it for me, for compensation.

My quilt didn't place, and after seeing the competition, I felt that was absolutely fair and that the winning quilts well-deserved their ribbons.  My quilt is lovely; I am proud of it.  It will hold an honored place in our house.  I think my embroidery was well-done, and of course, Judy's quilting enhanced the quilt.  The scalloped border was refreshingly different and added to the quilt.  But the blocks were basic and simple four-patch blocks. 

The winning, blue-ribbon quilt was accidentally mis-placed in another division, but it was judged in competition with the quilts where mine hung. Rita once again placed with her block of the month Dear Jane quilt winning a red ribbon. And a quilt that also included embroidery and appliqued little girl dresses, each tiny dress different, won the white ribbon. Here are the 1st, 2nd and 3rd place quilts in this catch-all "Kits" division, as well as my contribution to this category:


Here's the blue ribbon winning quilt that
was in the "kit" category.

Again, the top quilt

Close up that shows the incredibly dense
HAND quilting that this quilter did
on her quilt.

Another close-up of her hand quilting and
applique.

My Redwork Romance quilt

Rita's Dear Jane quilt, complete with the intricate borders.
This quilt was a "two-sided" quilt, with the
quilting of these tiny blocks forming a lovely
second quilt on the back.

The committee member who was in charge of fashioning
the ribbons did an outstanding job!  This is Rita's 2nd place, red ribbon.

The charming third place winner.  Notice the absolutely
beautiful quilting on this quilt.  Within each of
the four sections of the quilt, a different quilting
stitch is done.

The placards contained the information that we
quilters included on our entry forms.

One of the lovely little dresses which stood out from the quilt with a 3-D effect.
You can see the tiny, intricate embroidery on the dress.  Again, click on the image
to see the outstanding quilting done on this quilt.

The little baby girl faces as corner stones--so charming!  You can see, too,
some of the tiny hand-embroidery strategically placed within the sashings.

Waco Quilt Show--Part One

I am so proud of my fellow quilters!  Our show this year is outstanding.  I plan to post three parts and to keep it chiefly personal, emphasizing the three categories in which my four quilts were displayed.  I can't resist, here, though, sharing with my readers the Best of Show quilt.  My fellow China Dolls Bee member, Rita, won this award.  Rita had a total of 13 entries in the Show!  I lost count of how many ribbons she won.

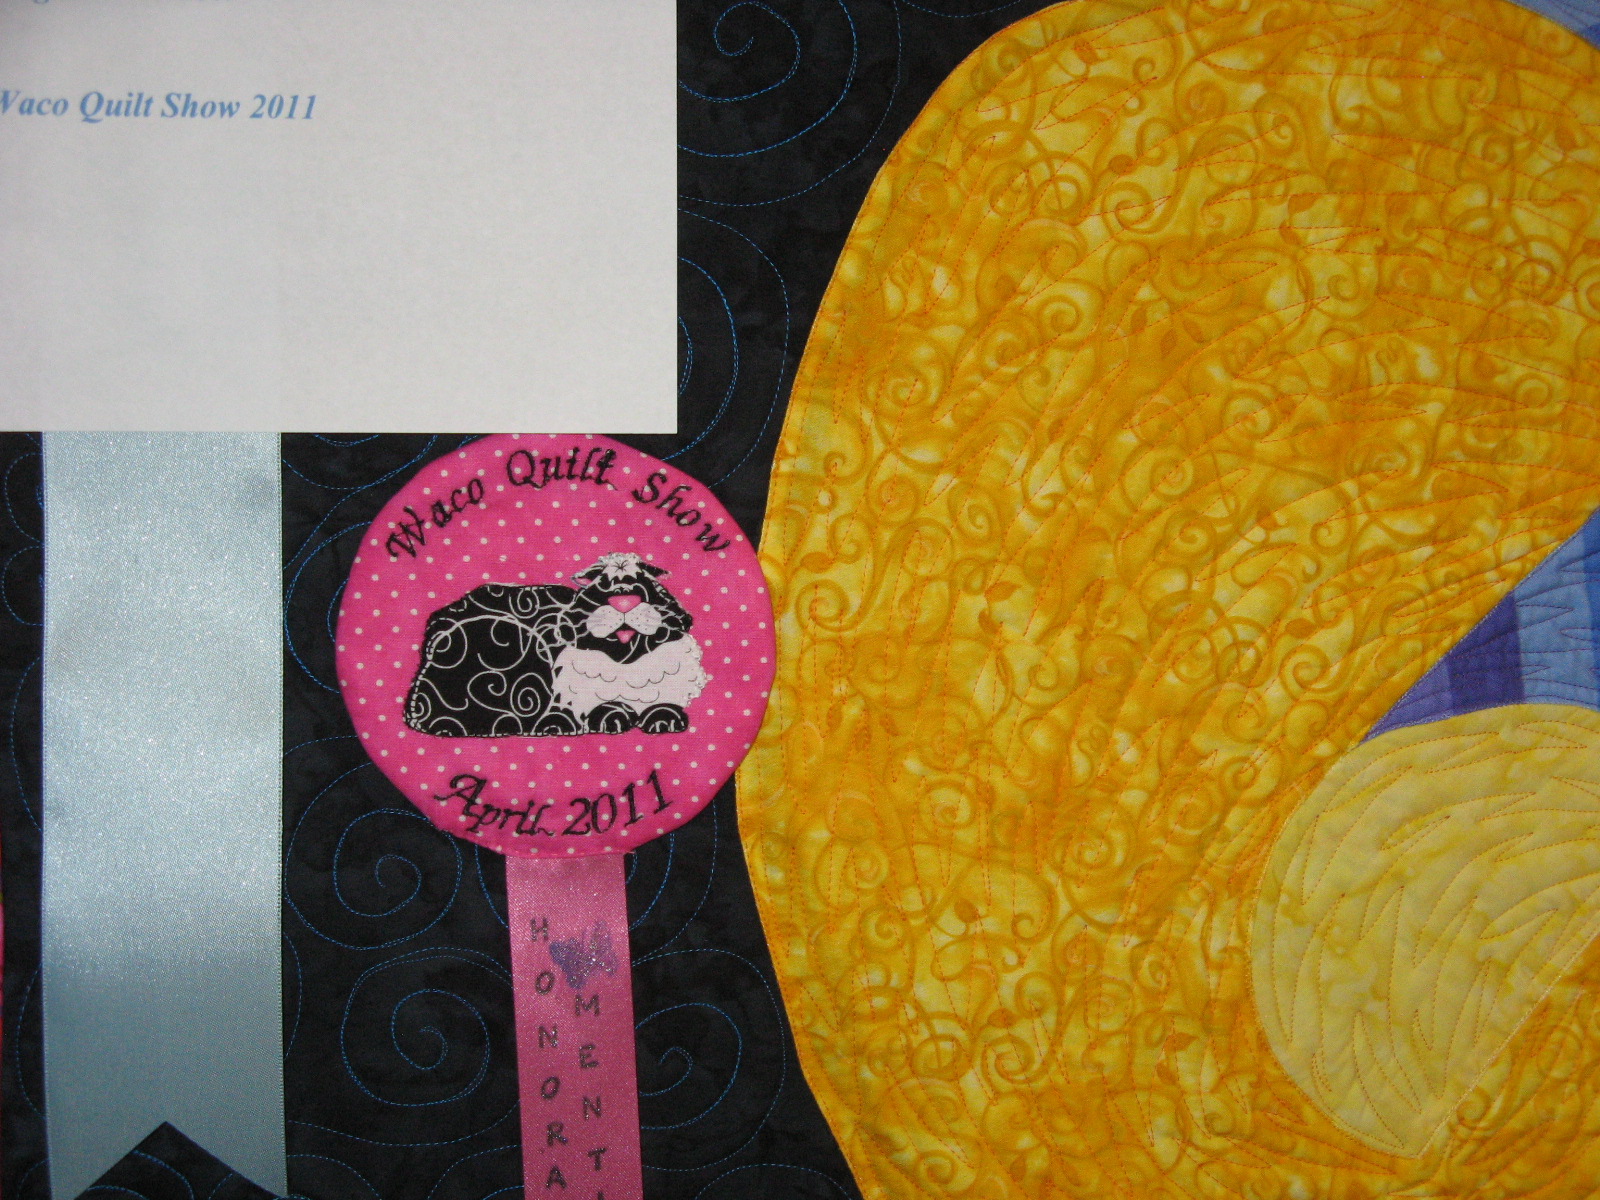
First, the Art Quilts.  I entered two quilts in this division, my big scrolls quilt called Jubilation! and my very small one called Aqua in Abstract.  I was delighted to get an Honorable Mention ribbon for Jubilation. Good friends Judy and Rita took home the top honors, with Rita winning the blue and Judy, the red and white ribbons.  Here are their outstanding quilts:

This is a close-up
of the fourth panel, the winter
one. 

Rita was commissioned by good friends in Kentucky to do a series of quilts
of the friends' lovely back yard in the four seasons of the year.  Based on photographs
she fashioned these quilts, using the fused "snippets" technique.


This quilt by Judy Steward was
designed and constructed in the spring of
2009, at Quilting Adventures, in the same
Katie Pasquini-Masopust class that I took.
I made by Aqua in Abstract quilt (also entered
in the Art Quilt division) in our Show.


Here's Rita with her 4 Seasons quilt, showing only the summer and fall panels.


My honorable mention ribbon. 

Here is my Jubilation! hanging in the Art Quilts division.
 

This is Rita's Best of Show Quilt.
She made it at a retreat under the tutelage
of famed quilt artist, teacher, and
innovator, Georgia Bonesteel.  She has attended
several of these retreat/workshops, and Rita has
produced a number of quilts influenced
by Bonesteel.


And this is Judy's 2nd place art quilt, a lovely
fall leaf. 


Here's the Best of Show ribbon on Rita's quilt.

Here's a close-up of the applique
on Rita's Best of Show quilt.

A close-up of Rita's Best of Show quilt, which was
a "trip around the world" quilt, utilzing many
tiny squares.

Tuesday, April 5, 2011

Auction Quilt #3!

I wasn't pleased with my little Minkee blanket that I made yesterday, so today I decided to make a second Minkee, a third auction quilt.  I suppose I'll let the other one be put in the auction, but if it's not bid on, I won't feel too bad! 

This time I decided to use just one big piece of the Minkee rather than wrestling with different types and patterns of Minkee.  This time, I backed it with strips of pink fabrics from the Cotton Candy quilt I made for our friends' baby, due this month, and one of my four entries in this week's Quilt Show.  It's pretty ho-hum, admittedly, but the construction is better and neater.  I love the pink fabrics, so perhaps that ought to be the front, and the Minkee, the back!

Incidentally, I wish I had read the link above before I made the first Minkee blanket!  That site has some excellent tips.

The Minkee side

The back side, with 3 different pink
fabrics from the Cotton Candy quilt.

I turned back the top corner
so that the backing and the front
could be seen at one time.


Monday, April 4, 2011

My Two Silent Auction Quilts

For the Waco Quilt Show this week, I committed myself at one of our Guild meetings to donating two baby quilts for our silent auction.  Knowing that I had many juvenile fabrics on hand, leftover from various baby quilts I've made through the years, I thought I could quickly complete two.  I could have done that, had I started earlier! I began one some months ago, but left the borders, the quilting, and the binding until this past weekend.  And that was only one quilt.  For the other, I decided to make a simple receiving-blanket type "quilt" from soft Minkee fabrics, backed with flannel.  It isn't technically a quilt because (1) it doesn't have the typical 3 layers of top, batting, and backing (no batting) and (2) it has no quilting!

I'm quite happy with the first quilt that I made.  I used coordinating fabrics, depicting pairs of animals, so I am calling it "The Animals Came, Two by Two," though I'm not putting that name on my label, which simply has my name on it.  The Minkee blanket--well, the colors are nice!  I found this slipperly, stretchy fabric rather hard to work with.  It is soft and comfy, though, so perhaps someone will find it worthy of a bid.

Now for some photos of the two silent auction quilts:

The block pattern is the tried and true Log Cabin, with an unusually large
center square, all the better to show off the fabric.  It has a narrow yellow
inner border, wide borders of two different fabrics, and corner-stone
blocks.  I bound the quilt with the same fabric used
in the top and bottom borders.

This shows one of the complete log cabin blocks, with the dark side (green and red)
and the light side (blue and yellow).  The green "log" to the right is actually the green
log for the next-door block, not a part of this one.  My favorite animals
in this print are the elephants and the giraffes!

I added the "corner post" blocks, smaller log cabins,
to make a definite division between the two border fabrics.

This was the first quilt in many years for which I machine quilted the entire thing.
Here the backing fabric (I thought this quilt needed some fish!) shows the
free motion quilting better than the top does.  I deliberately chose a dark blue
thread for the top, to make the amateurish quilting less obvious!

This block shows the "straight-line" machine quilting that I did.
A serpentine stitch in the yellow and red logs.  A straight stitch
in the blue ones.  Back to the serpentine in the yellow inner border.
The green log also has a serpentine stitch.  For the center square and the borders,
I free-motioned stitched loose and casual loops and circles around each animal, and then added
some loops between animals, where there was empty space.

I used two coordinating border fabrics because I didn't have enough
of either one to make four.  The top and bottom border fabric has
 pairs of animal faces, and it includes many animals
not featured in the other fabric. Most of the animals
appear to be smiling.  I really love the pink pigs and the black
and white raccoons!

Here's the Minkee blanket.  I did have fun devising
the pattern.  As I was laying it out, I repeated it to myself
as I laid it out starting on the bottom left:
"Pink, green, blue, pink, pink."
And then starting again on the bottom, the next vertical row
began with a green square,and I followed
 the same sequence of colors.  I was
delighted to discover that
this pattern resulted in nice diagonal
lines of the three colors.

I used a baby-animal printed flannel for the backing, which has the blues and greens, and at least the pig
has a pink face!  There are really cute descriptions for each animal, such as
"Baby chick skips in the rain; baby piggy plays in the mud; baby turtle
strolls with lady bug."  I like to imagine a mommy reading these to her
baby as she rocks him or her!

Some of the Minkee has raised dots;
some has stripes;
others, stars; and
still others,
plain.

Friday, April 1, 2011

Redwork Romance

One other just-finished quilt that I'll enter in the Waco Quilt Show is my redwork one.  I've named it Redwork Romance.  I have worked on the redwork embroideries for, literally, years.  I would guess about six or seven!  For long stretches of time, I would do nothing on this project, and then I'd take the embroidery to work on when I was out of town.  When my Bee began last fall, I started taking this embroidery to do, since I really disliked having to pack up and haul my sewing machine anywhere.  After I had finally done all 12 of the embroideries, then I assembled them into a quilt.  This was the first and only kit I've ever purchased.  The Alex Anderson pattern and fabrics turned into a wonderful quilt! 

As usual, I got my machine-quilting wizard friend, Judy Steward, to quilt it for me.  She did her typical outstanding job!  I especially love the way she quilted closely within the embroidered squares, which highlighted the bouquets of flowers and made them look almost like trupunto.   She also did a beautiful quilting job in the borders.

And now, some pictures.  As usual, clicking on the photos will enlarge them.

One of the flowers.  You can see the close stippling
quilting that Judy did, and hopefully, you can see how
the flower looks very like I had used trupunto.

Judy echo quilted around each bouquet and then, as mentioned above,
stippled closely in the background.


This close-up shows several of the flower bouquets and
then the adjacent four patch blocks, each of which
used a different Alex Anderson fabric.


One of the most charming aspects of this design is the scalloped edge on
the borders!


Here's the quilt in its entirety.


Thursday, March 31, 2011

Cotton Candy Quilt Finished!

My Guild's semi-annual Quilt Show is April 8 and 9.  We're to deliver our quilts on April 6.  So I am working right down to the wire.  Of the four quilts I am entering, two have been hanging in our house for over a year.  But two are brand new.  Cotton Candy is what I am calling this pink quilt, which will be sent later in April to a baby girl named Bridget who lives in Virginia.  I usually have my good friend and super-expert quilter, Judy Steward, quilt my quilts for me for compensation.  Cotton Candy, however, was not pieced in time for Judy to quilt it.  So with much fear and trepidation, I did the machine quilting in the quilt's center, and then did some hand-quilting in the wide borders, using Perle cotton and the so-called "big stitch" or "utility stitch."   I did this quilting randomly, going around most of the motifs in the border fabric.  I've done the stitch before, in a baby quilt for one of our grandsons, and learned that it is much faster and easier to do than the traditional quilting stitch.  Too, it is easier on arthritic hands!

Here are some pictures of Cotton Candy:

Here's Cotton Candy, pinned to my design wall.  All that's lacking
is for me to steam it, to encourage it to hang straight and flat, and attaching
the hanging sleeve and a label.

A close-up showing both the machine stitching in the quilt center
and the big stitch hand-quilting with Perle cotton thread #8.  When you click to
enlarge, you'll see a "B" that I have embroidered in the bottom
border; this is for Bridget, the baby girl who will be
receiving this quilt soon.


Here you can see that in the pale pink setting triangles in this quilt
which has its block set "on point," I used a machine
serpentine stitch around the edges of the setting triangles.

Here you can see in a closer view the straight-line machine
stitching that I did, with two lines of stitching in each small block, zig-zagging across the width
of the quilt.


Friday, March 25, 2011

Quilt Camp 2011, Part Two--Phillippa Naylor

The three other teachers at Quilting Adventures during the week I was there were Rose Hughes, Phillippa Naylor, and Kim Diehl.  All of these, like Carlson and Stein, were gifted and creative quilters and teachers.  Not only that, but all three (like fellow-teachers Carlson and Stein, too) were wonderful public speakers and each had a great sense of humor.  Because I have so many photos, this posting will feature Phillippa Naylor.

Phillippa is, first of all, a master machine quilter (having won awards at the International Quilt Festival in Houston for "Machine Artistry" and "Merit Machine Quilting") but also her designs are most unique.  It's difficult to describe her work precisely, so I'll quote from her website a statement of how she herself describes her own work:  "I consider myself to be a 'contemporary' quilter rather than an 'art' quilter, and by that I mean that my quilts are very much a modern interpretation of traditional quilts of the 19th and early 20th centuries. Inspiration often comes directly from a traditional quilt, the design being updated by the use bright hand dyed fabrics, by curving all the seams and then stitching the three layers of the quilt (the top, batting and backing) together, by machine, with free flowing patterns."

Phillippa is a beautiful woman who dresses like a model in clothes we all suspected were her own designs.  AND she gave a make-up lesson in the application of lipstick that lasts all day to her students! She could pass for a woman in her early 30s, but given the age of her son, we all figured she HAD to be in her 40s!

In addition to the awards mentioned, Naylor has won three other "big" prizes in Houston.  Her work is breath-taking, and you have to see it up close to appreciate it fully.  I'd urge you to go to her website to see more of her wonderful quilts and to check out the many awards that have been presented to her.  Below are some quilts she brought for us to see at Quilting Adventures:


This quilt illustrates the "skewed" nature of Naylor's quilt blocks.


One of Naylor's quilts


This shows the entire quilt from the close-up above.  AND you can see how
lovely Phillippa is and how stylishly she dresses!


Here Naylor is showing the "whole cloth" quilt for which she won a major award.
It is quilted extremely closely and intricately, and the thread she used on
this white quilt varied in pale colors.

No, this isn't a quilt!  This is a photo of a slide taken from Naylor's Power Point Presentation.
It shows one of the many unique Halloween costumes that she and her son have together concocted over the years!

Wednesday, March 23, 2011

Quilt Camp 2011, Part One

My fourth time at Quilting Adventures in New Braunfels turned out to be as delightful and productive as the other three sessions were.  This time I was in teacher Marcia Stein's class.  We worked from photos, which we first traced, then enlarged, and then used our enlarged drawing to make templates.  Marcia taught us her method of machine applique, but most of us chose to use the faster method of fusing.  I hope we didn't disappoint her!  If we did, she never let us know, and she was wonderfully helpful to each of us as we worked.

One of Marcia Stein's quilts.  Yes, the man
portrayed really DID have on a shirt
that looked just like this!
The appliqueing on my quilt is now done, but it hasn't yet been sandwiched and quilted.  Once that is done, I'll no doubt post again to show it.  Meanwhile, here are some of Marcia's quilts, as well as the quilts of one of the other teachers, Susan Carlson.  I bought a book from Susan, and I hope one day to try her marvelously innovative approach to quilting!  I plan a Part Two to show some of the other teachers' works, as well as some of the quilts constructed by fellow students.
Marcia often portrays
people from the back in her quilts, and she
encouraged us to bring similar photos!

Susan Carlson's rhino, inspired by one of
16th century artist Durer's black and white woodcuts.


Another of Carlson's--demonstrating
how beautiful and fanciful a
beetle can be!


Carlson's son--when he was in
his John Lennon-look-alike stage!
Having all grandchildren currently playing soccer, I
particularly loved this one!


With my passion for blue and white
china, I loved this one by teacher Stein!


Thursday, March 3, 2011

Cotton Candy Quilt Top

This is a replacement for the photo that I had up at first, the
one where which was turned top to bottom!  Sorry!
For the past week two weeks I've been working on a crib quilt for a baby girl to be born in April, the daughter of our dear friends Erin and Michael.  Good friend Patty and I traveled to Ft. Worth to check out the wonderful quilting fabric store Cabbage Rose  two weeks ago yesterday.  There I found some wonderfully girly fabric that I fell in love with and decided to use for this quilt.

The block was the super-simple Rail Fence block, but these are a small 3", so it took 54 blocks in all.  The sewing of the blocks went fast, but the sewing of the on-point blocks into diagonal rows took much longer.  As of this morning, though, I attached the last two borders.  Because the Waco Quilt Show is fast approaching, I've been unable to find a machine quilter to quilt Cotton Candy (as Bee friend Hilary christened it!) for me.  So I will attempt, with much fear and trepidation, to quilt it myself.  I plan to use simple, straight-line quilting in the quilt's center and then do some much more-fun-for-me hand-quilting in the borders, using the fabric's print to guide me around some of the bigger, bolder flowers.

I just turned around quickly and looked at my quilt.  Lo and behold I saw a mistake--a block that is turned the wrong way!  This happened the first time I made this quilt.  That time, though, I only discovered the goof after the quilt had been machine quilted.  Then I decided I would call this block my deliberate mistake.  Click on that link to learn this interesting bit of quilting history!  This time around, however, I've found my error in time to remove that block from the quilt and put it back in correctly.  I don't need to make a deliberate mistake in order to demonstrate humility; there are always plenty of minor goofs in my quilts!

Hmmm, maybe I should offer a prize to the person who finds my wrongly placed block.  Actually it's pretty easy to spot it, so I'll offer the prize to the FIRST person who finds it.  If you're a quilter, your prize will be quilt-related.  If not, I suppose I'll have to come up with something else.  Happy hunting!  As always, remember to click on the image to vice it bigger.


I decided not to crop this one, so my far-away friends can
have a little glimpse of my design wall.  Note the banner to the
right, my first attempt at paper-piecing, a banner that
I use in this blog to introduce myself.  Also one friend, if she looks carefully,
can see the first fabric postcard I ever received, a card she sent to me!  To the left,
of course, are my Elfa drawers, which hold my stash.


Tuesday, March 1, 2011

The China Dolls Meet Again!

I believe I've written at least one blog about the new quilting bee that has formed in my neck of the woods, the China Dolls Bee.  I didn't know how I'd manage with yet another meeting to attend, but I have loved being in this Bee.  The women are a fun, talented bunch, and we help and advise one another each time we meet.  We meet usually twice a month, taking turns hosting.  Yesterday it had rolled around to be my turn again.  Each bee member brings something to work on.  Many of these women are machine embroidery lovers and true experts, so often they bring their amazing embroidery machines.  Some bring handwork to do, applique or hand embroidery or perhaps sewing down the binding on a just-completed quilt.

The hostess usually prepares lunch for the group, and, oh, the wonderful meals we've shared!  Soups of all sorts this winter usually, but yesterday I decided to prepare a much-loved chicken wild rice casserole, plus two congealed salads, tomato aspic and pineapple/lime.  The aspic, I would say, got the most raves!

The last time we met, at Lynne's, was on Valentine's Day, which also happened to be her birthday.  She had made a delicious chicken chili and huge tossed salad, but also some beautifully decorated Valentine cupcakes.  Lynne invited the editor of the weekly paper for the two communities of China Spring [thus our name] and Bosqueville to come learn about this new quilting bee in China Spring.  This charming man is not only editor but also photographer, and as a graphic artist himself, he was fascinated to learn more about quilting.  He tooks many photos, some of which ended up on the front page of The Enterprise, his paper, under a huge headline reading "Queens of Quilt."

Below are two of the pictures Clint took:
Here I am, embroidering  my first Japanese embroidery, Sashiko. 
Am I right, fellow blogger LinLin, that I was the one who
got you interested in Shashiko?  I'm wearing
a little felt heart pin.  I made all of my Bee friends these pins; you'll
see them on many of them below!

From left:  Dodie, Hilary, Priscilla, Rita, Sandy, Alice B., Alice E., and Lynne, our hostess.  Lynne is the
maker of the quilt under which we are sitting.  When I saw this picture for the first time yesterday, I said
to the gathered group:  "You know what?  We are a pretty darn good looking bunch of women!"
And, just for fun, my aspic recipe:

1 box of lemon Jell-O
1 can of stewed tomatoes, any flavor, but preferably peeled, sliced tomatoes
1 tablespoon vinegar

Heat the stewed tomatoes to boiling.  Pour in the Jell-O and stir until dissolved.  Add the vinegar.  (Rice vinegar is mild, but I used red wine yesterday, and that was good and tangy.)  I have a large Tupperware ring mold that I use, and for this, I triple the recipe.

Pour into a small oiled mold or a small square Pyrex dish.  Chill until firm.  Serve with a dollop of mayonaise on a pretty lettuce leaf.